Like most Power Platform developers, I am a heavy user of the XrmToolBox a community project led by Tanguy Touzard. The myriad of tools it surfaces just makes my day to day job a lot less painful. I also secretly been wanting to write a tool of my own to contribute to this amazing project for a long time.
The wait is over 🎉
Today, I’m proud to release my first tool called Custom API Manager, and I really think that it will fill a gap in the current Custom API authoring experience.
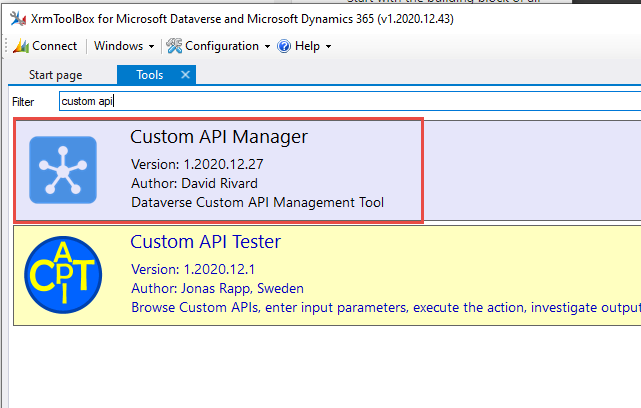
If you want to skip the details, you can fire up your XrmToolBox application and install the Tool from the Tool Library. You will then have access to it in the Tools section.

If you need some APIs to play around with, you can install my collection of generic Dataverse Custom API (Shameless plug 😏 )
What’s a Custom API anyway?
At the time of writing, Dataverse Custom APIs are still considered a preview feature. If you want more information please look at Microsoft official documentation
I will blog more deeply into Dataverse Custom APIs but, In a nutshell, they give developers the ability to define their own REST messages to encapsulate business logic written in C# (using IPLugin interface from the Xrm SDK) with a set of Inputs (Request parameters) and Outputs (Response properties).
These messages are then exposed by the Dataverse WebApi and can be consumed by any method that can connect to it (Plugins, Power Automate, PCF, Modern-Driven Form javascript, External programs, etc…). The use cases are unlimited.

A current limitation of the Custom API is the lack of an editor for authoring and management purposes (like the Custom Action/Workflow Editor). Instead, the APIs, Inputs, and Outputs need to be managed separately and it can be hard to get the full picture of the APIs that are defined in a system. This is where the Custom API Manager comes in handy.
This is where the Custom API Manager comes in handy.
360° View of Custom API
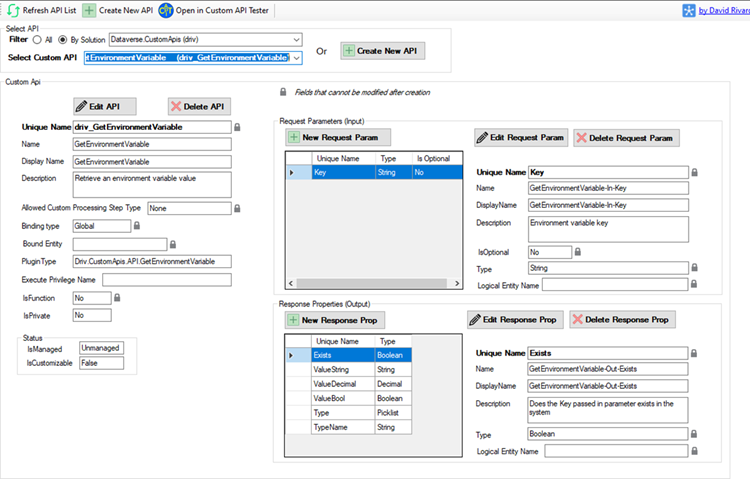
The goal of the tool is to provide full visibility of the Dataverse Custom APIs and related components like request parameters (inputs) and response properties (outputs) that are registered in your Dataverse environment.
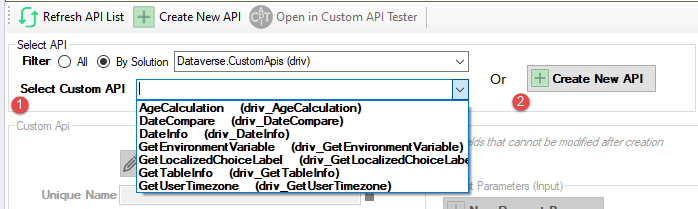
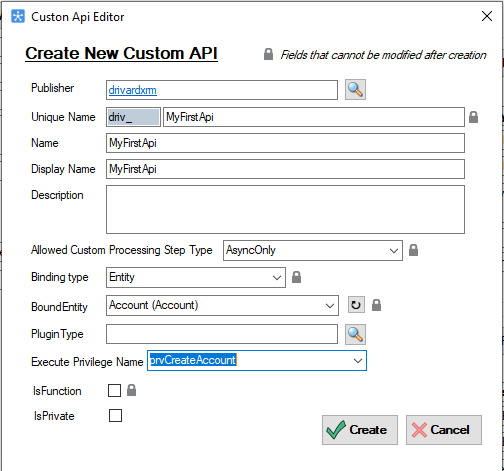
You can (1) select existing APIs or (2) Create new ones from scratch.
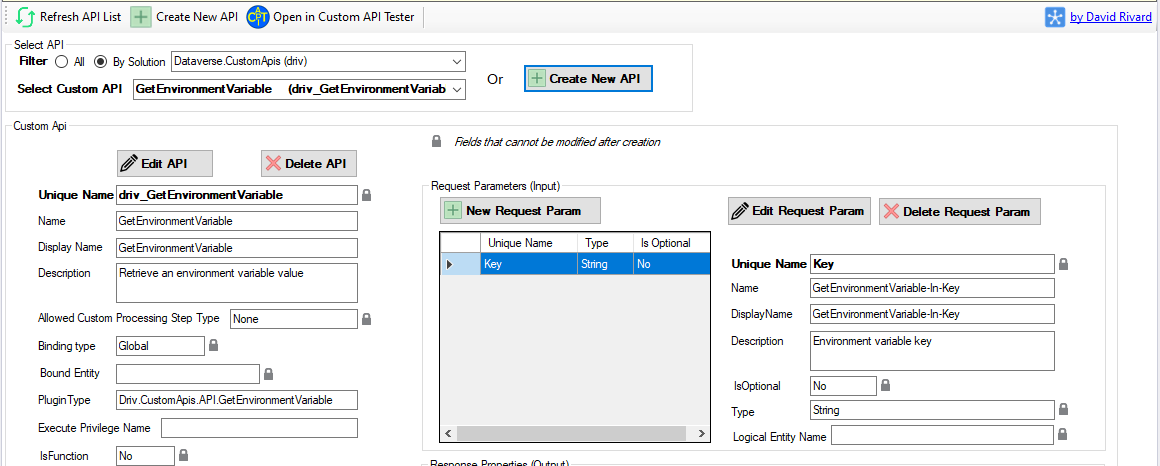
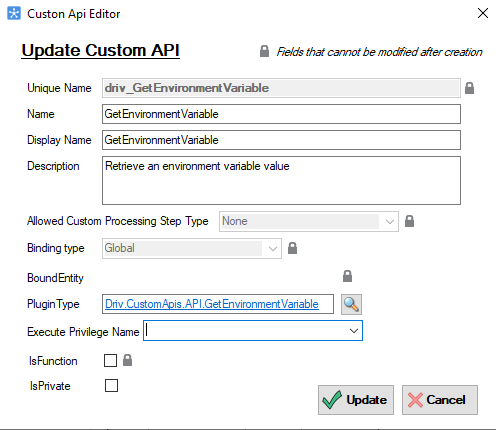
Once an API is selected, you have access to all the relevant information about the API at your fingertips. You can perform all CRUD operations on the API, Request Parameters (inputs), and Response Properties (outputs) very efficiently in the same UX.

Integration with Custom API Tester
My favorite feature is that the tool is integrated (both ways) with the Custom API Tester from Jonas Rapp. I had the opportunity to speak with him lately and we decided to make our tools communicate, I personally think that this joint-venture provides added value to both tools. 1️⃣ + 1️⃣ = 3️⃣
With this integration, you can Define your API in the Custom API Manager, and Test it right away using the Custom API Tester. (Bonus! You can even Monitor the test execution using the Plugin Trace Viewer that is integrated with the API tester… how cool is that 🤯)
On a technical side, I found it quite easy to implement tool integration and I encourage every XrmToolBox Tool author to find synergies with other existing tools in order to provide better experiences to the end-users.
Follow these 3 simple steps to leverage tools integration.
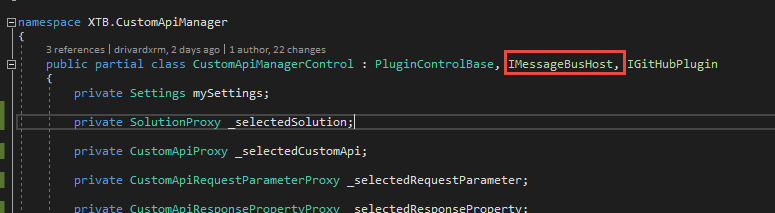
1- Implement the IMessageBusHost interface
First, you need your control to implement the IMessageBusHost interface contained in XrmToolBox.Extensibility.Interfaces Library.
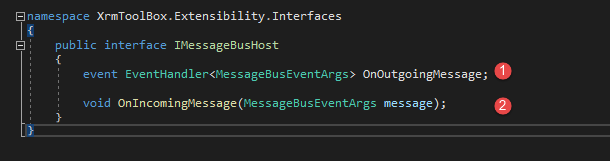
The interface need the following methods and event to be defined on your plugin class.
- OnOutgoingMessage: Event that will send request from your tool to another tool
- OnIncomingMessage: Method that will accept a request from another tool to fire up your tool
2- Define Outgoing Message
To send a request to another Tool from your own tool, you will need to define an event called OnOutgoingMessage. (this line of code will be added automatically in your class when you implement the interface)

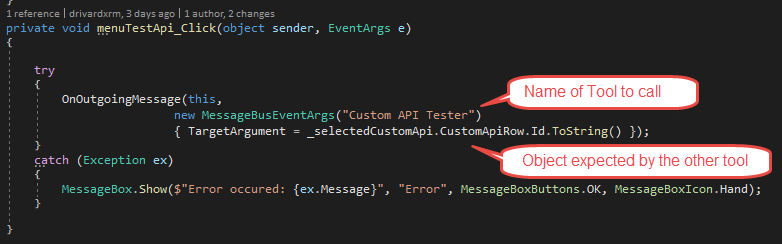
Once defined, you can call the event from your business logic. Here I’m calling the OnOutgoingMessage event when the user clicks on the Open With Custom API Tester button.
When calling the event you need to specify the following in the arguments (MessageBusEventArgs)
- Name of the tool to call
- TargetArgument: this is the object that the receiving tool is expects (Context). In our case, we send a string that contains the GUID of the Custom API to Open in the Custom API Tester
3- Define Incoming Message
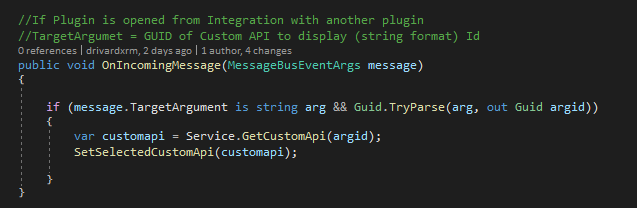
To receive a request from another tool, we need to implement the OnIncomingMessage method from the interface.
Here we can get the Context information from the TargetArgument object contained in MessageBusEventArgs received from the caller. It’s then up to you to do what you need with this information in your code. For example, get the GUID of the Custom API that we want to display in the form.
As a side-note Jonas Rapp just released a tool called XrmToolBox Integration Tester to test these kinds of inter-tools integrations, it really helped me during the development.
Lessons learned
Looking back on my XrmToolBox Tool authoring experience, I have to say that it is a personal challenge I am happy to have accomplished.
There is definitely a learning curve and you need to dust up your good’ol WinForm skills which is the stack that the ToolBox is built on. There are a lot of good resources to get you started (see link section at the end of the post ). I also found a lot of inspiration looking at some of the top Tools GitHub repos (ain’t that what open-source is all about).
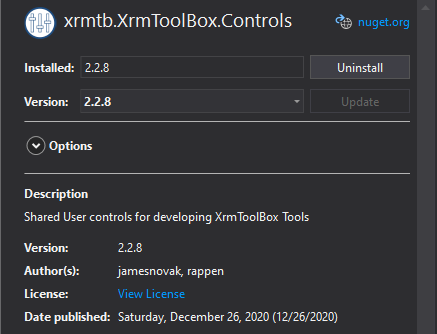
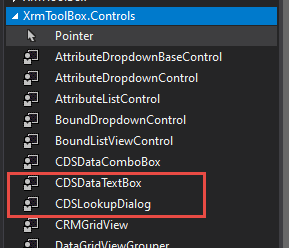
One of the hidden gems 💎 I found that saved me tons of time (and lines of code) was this collection of WinForm controls adapted to Dataverse: xrmtb.XrmToolBox.Controls. Particularly the CDSDataTextBox and the CDSLookupDialog that used extensively in my tool. Just install the NuGet package in your project.

Going forward
This is the first release of the Custom API Manager, I hope it will help some of you adopt and enjoy this new Power Platform extensibility option.
I would greatly appreciate any feedback so I can improve the user experience. Also if you have any ❓ questions or 💡 feature requests don’t hesitate to contact me in the discussion area of the GitHub repo.


Be First to Comment