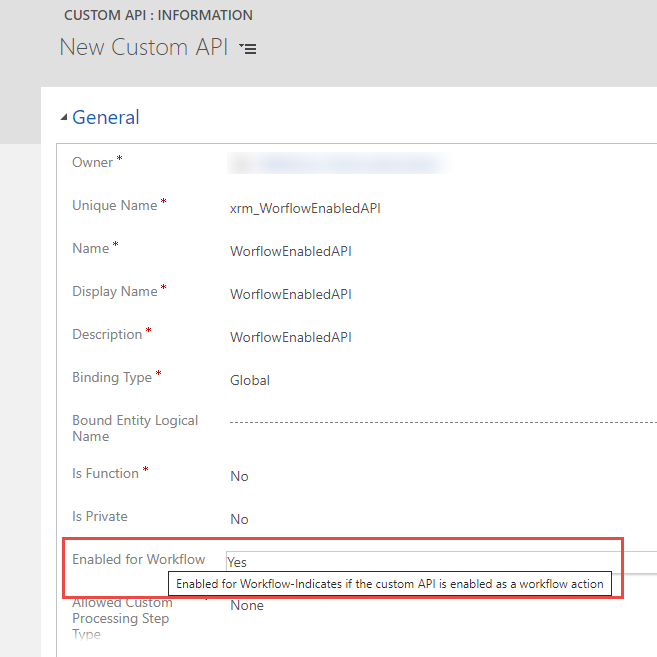
If you are developing Dataverse Custom APIs, you might have noticed that a new column (field) called ‘Enabled For Workflow‘ recently showed up in the Custom API form. In this post, we will try to make sense of this new feature, understand its impact on the Custom API extension model, and show how to use workflow-enabled APIs.
At the time of writing the feature is not yet ‘officially‘ documented, I will update the post and put the link here when available

What does it enable?
Well, the name of the attribute speaks for itself. If you set the ‘Enabled For Worflow‘ (schema name: ‘workflowsdkstepenabled‘) column to True ✅, your Custom API will be available to be called inside a Dataverse classic workflow using a ‘Perform Action‘ step.
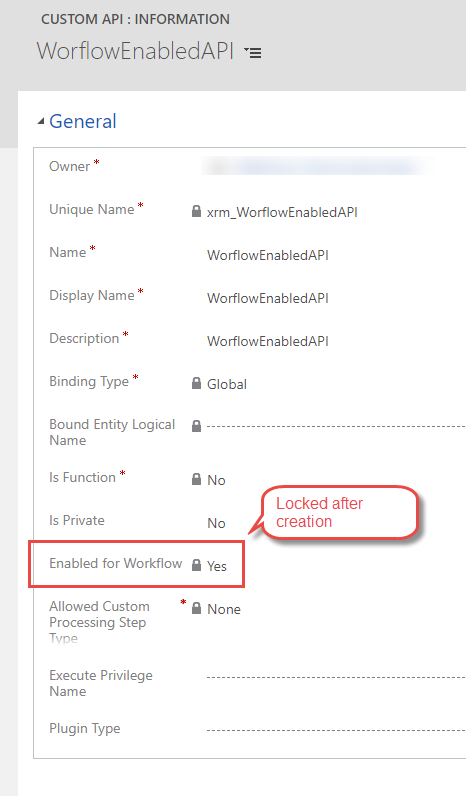
It’s important to note that setting this attribute can only be done at the creation of an API and cannot be updated after (more on that later).
Wait… did you say Classic Workflows?
You might find it unusual that Microsoft would invest in anything related to classic workflows since we are ‘supposed‘ to move away from that model and adopt Power Automate Flows.
For me, it makes a lot of sense, especially for the user (or developer) adoption of the Custom API model. It crosses out one of the limitations that might keep some developers away from Custom APIs.
Personally, I still use classic workflows (a lot less I admit), and the fact that I wasn’t able to use my Custom APIs inside a workflow like I would with a Custom Action always bugged me. An API by definition should be as universal and agnostic as possible, and I should be able to call it from wherever I want.
Also, with this new feature, the Custom APIs now have (virtually) full parity with classic Custom Actions. So If you were reluctant to migrate to Custom APIs for your custom messages development, there’s one less reason.
XrmToolBox Custom API Manager update
I have added the new attribute in the latest release of my Custom API Manager for XrmToolbox, so please update the tool to the latest version (v1.2021.5.35 or +) if you are using it.

If you don’t know this tool, I strongly recommend that you take a look at it as it provides a great authoring experience for Custom API’s (shameless plug 😁)

How-to use a Workflow-Enabled Custom API
To consume your Custom API inside a classic workflow, you only have to set the ‘Enabled for Workflow‘ attribute to True ✅.
Your workflow-enabled API will now be surfaced in the workflow designer using the ‘Perform Action‘ Step. After that, the process is exactly the same as consuming a classic custom action.
1- Select the ‘Perform Action’ Step

2- Select your workflow-enabled API
In this example, I use the GetEnvironmentVariable Custom API from my collection of Custom API community projects. 👉 See the details of the implementation of this API here.
Note here that any Custom API where the ‘Enabled for Workflow‘ is set to false ❌ will not be surfaced in the list.

3- Set the Inputs (Request Parameters) of the API
After you select your workflow-enabled API, you can set the input parameters by clicking on the ‘set properties‘ button. Here I supply the schema name of the environment variable I want to retrieve in the input property called ‘Key‘

4- Outputs (Response Properties) are accessible
The outputs of your API are now accessible in the following steps and you can use the values in your workflow logic.
In this particular example, I check If the environment variable called ‘driv_SendMail’ exists in my environment and if the value of the environment variable is true, If Yes then I will send an email.


5- Execute the workflow
You can see the result of the workflow execution, my custom API was called inside the workflow, the results of the API call were used to make a decision, and a mail was sent… et voilà.

Bumps on the road
One thing to keep in mind is that the attribute cannot be modified after creation. This poses a problem for any API created before the rollout of this new functionality. If you want to use your existing custom API in workflows, you will need to erase and recreate them with the ‘Enabled for Workflow‘ flag set to True. 🤷♂️

Impact on my Custom API project
Because I really want to take advantage of this feature, I had to come up with a plan to update my community project that contains a set of very useful generic APIs. But as said before, the ‘Enabled for Workflow‘ can only be set at creation.
By mingling with the solution XML files, repackage an unmanaged solution and reinstall the solution in a fresh environment, I was able to recreate the APIs and make them work with classic workflows …. So far so good. The latest version is available on my Github repo.
Problem is that if you had a previous installation of the solution, you will need to uninstall everything and install the latest version (v1.2021.05.41 or +), sorry for the inconvenience if any.
Conclusion
The new ‘Enabled for Workflow‘ field on Dataverse Custom API is a great addition that enables your APIs to be called inside classic workflows. It removes a limitation and gives more reach to your APIs.
Keep in mind that this setting can only be set at the creation of an API record and cannot be updated afterward, so you might have to recreate your existing APIs.
For this reason, I strongly advise that you set that you always check this attribute to True when you create a new custom API, you never know if someone would want to consume your API inside a workflow, don’t limit yourself.
Happy API’ing!
Blog Post Image by Gerd Altmann from Pixabay

Have you noticed issues when moving a workflow-enabled custom API to another environment via solution export/import? I was trying this, but found the sdkmessage that gets created behind the scenes has the workflowsdkstepenabled field set to false, with no way to change it to true.
Unfortunately, to my experience the workflowsdkstepenabled as proven to be a complete mess and its not easily transferable between environments. I would stay away from it. I would stick to classic actions if you really need to call from a classic workflow, you can basically use the same code.