
In a previous blog post, I described how to use the new modelbuilder command group of the Microsoft Power Platform CLI (PAC CLI) to generate early-bound classes for Dataverse code customization projects.
This time we’ll take this a step further and explore how to automate the early-bound class creation process by invoking the PAC CLI modelbuilder within an Azure DevOps pipeline.
🔗Link to previous post here :
How to Generate Dataverse Early-Bound Classes with PAC CLI ModelBuilder
When it comes to Dataverse code customizations, like server-side plugins, early-bound classes can play a vital role in the development process. These classes offer a strongly-typed representation of Dataverse entities that empower developers to ensure code reliability, leverage IntelliSense, and enhance overall productivity.
Although I’ve previously demonstrated how to generate early-bound classes using PAC CLI modelbuilder command locally, there are several advantages to delegate this task to an Azure DevOps cloud-based build agent, such as :
- Consistency: Especially when several developers are working on the same project, producing the early-bound classes through an automated pipeline ensures that the process is always carried out in the same manner using a build agent regardless of the developer machine configuration.
- Security: In some scenarios, the developers might not have all the security clearance using their own credentials to access the needed metadata. By using Service Connections to Dataverse environments defined in Azure DevOps, only approved connections can be used and their usage can be monitored by internal IT departments to ensure compliance.
- Reusability: Once you have created an Azure DevOps pipeline to generate early-bound classes, you can reuse it for all your projects. This helps to maintain coherence in processes across multiple projects.
Model generation from Azure DevOps
Here is a high-level overview of the process that will be implemented:
- The developer edits the builderSettings.json file on his computer and checks in the file to the Azure DevOps code repository. As seen in my previous post, this file acts as the blueprint of the process and contains the list of entities, messages and other parameters supplied to the modelbuilder.
- A pipeline is launched that connects to the source Dataverse environment and executes the PAC CLI modelbuilder command using the settings file as an input.
- The generated early-bound classes are commited to the repository
- The developer pulls the latest changes locally and uses the newly generated early-bound classes in the code project.

Pre-Requisite
To ensure the pipeline works correctly, the following requirements should be considered:
Service connection
In order to establish a connection between the pipeline and a Dataverse environment, we need to create a Service connection within our Azure DevOps project.
The initial step involves setting up a (non-interactive) application user and assigning the necessary security role in the Dataverse environment. Follow the instructions outlined in the blog post below for a detailed walkthrough of the process.
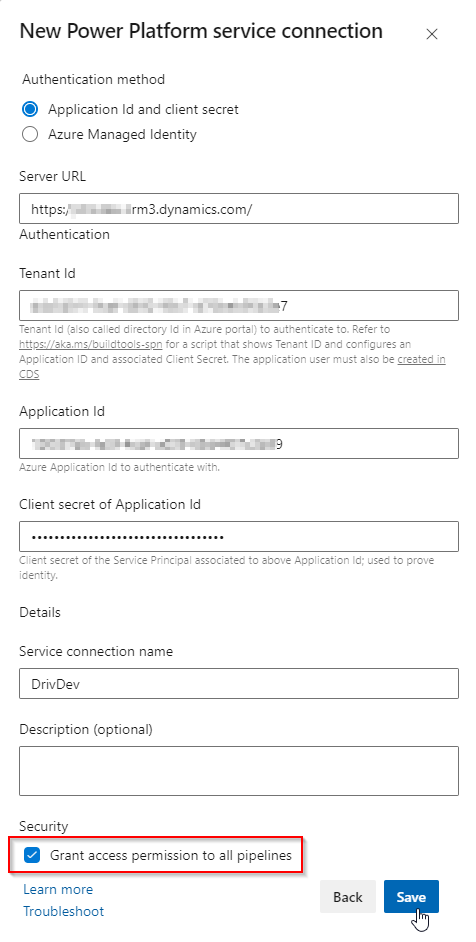
Once the application user is correctly configured, head to your Azure DevOps project and go to Project Settings -> Service Connections -> Add New and choose Power Platform

Configure the service connection with the URL of the Dataverse environment and the credentials (TenantId, ApplicationId and Client Secret) of the application user and give it a name.
Install Power Platform Build Tools
The Power Platform Build Tools extension needs to be installed in the Azure DevOps environment. This extension contains the official Microsoft set of tasks for Power Platform ALM. It will be used to install the PAC CLI on the build agent.
Learn more about this great extension here :

Microsoft Power Platform Build Tools for Azure DevOps - Power Platform | Microsoft Learn
Setup the code repository
A code repository needs to be initiated in the Azure DevOps project.

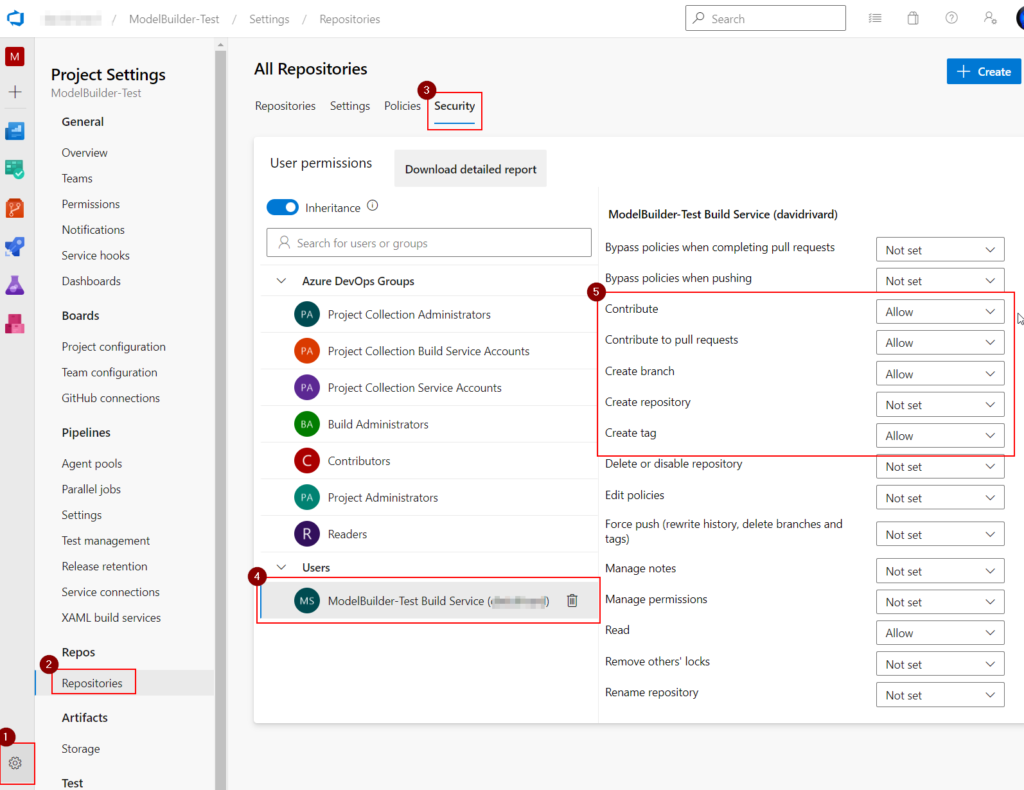
Since the main purpose of the pipeline is to generate early-bound classes files and check them back in the code repository, it’s necessary to give the build agent the contribute role on the repository. Otherwise permission errors will occur.

In order to give the appropriate rights, head to the Projects Settings of the Azure DevOps project and go to the Repositories section and select the Security tab. Under the Users section, choose the Build Service user and set the Contribute role to Allow.
Setup the Azure Pipeline
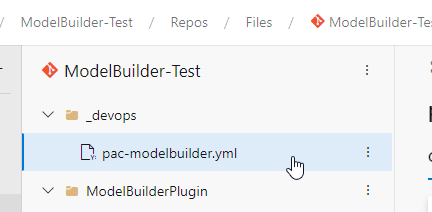
The pipeline itself is a declarative configuration file in YAML format that outlines the steps and tasks required to execute the process. In this example, I will maintain the pipeline file within the code repository of the project.
With this in place its easy to setup a pipeline using the Existing Azure Pipelines YAML file option
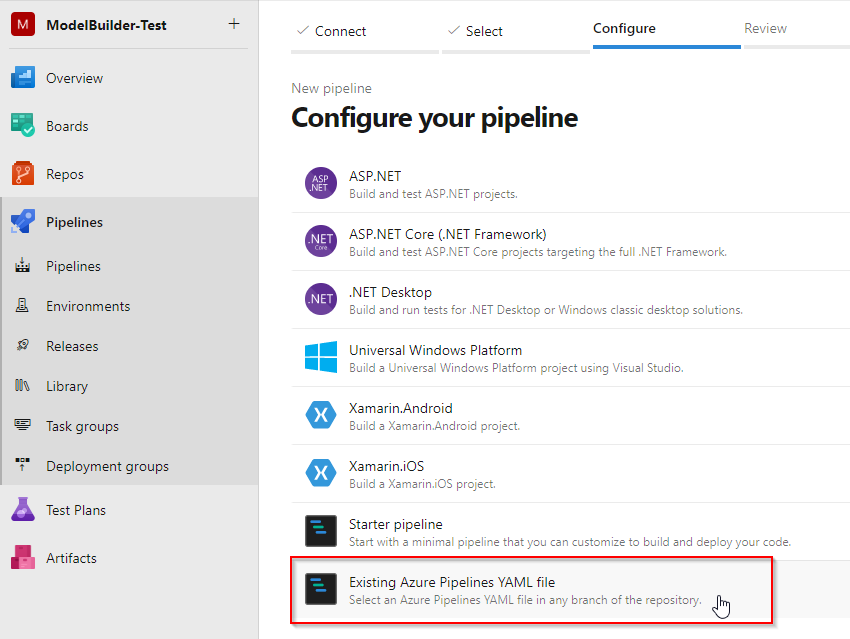
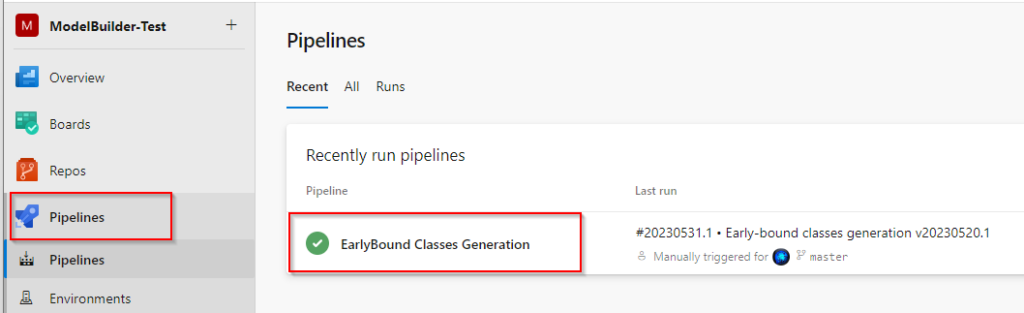
We end up with a pipeline that can be executed on demand.
Azure Pipelines is a vast and complex subject, it is highly recommended to refer to the official documentation to gain a deeper understanding of its intricacies :
Azure Pipelines documentation - Azure DevOps | Microsoft Learn
I will cover every step of the pipeline in detail, but the final result looks like this. Feel free to grab this example as a starter and adapt it to your specific use-case.
1- Parameters
parameters:
- name: serviceConnectionName
  type: string
  default: '{YOUR-SERVICECONNECTION-NAME}'
- name: serviceConnectionUrl
  type: string
  default: 'https://{YOURENV}.crm.dynamics.com/'
- name: outdirectory
  type: string
  default: '{PATH-TO-OUTPUT-DIR}'
- name: settingsTemplateFilePath
  type: string
  default: '{SETTINGS-PATH}/builderSettings.json'

trigger: none

pool:
  vmImage: windows-latest
The pipeline expects 4 input parameters. I usually put some default values but these can be supplied at runtime if need be.
- serviceConnectionName : This is the name of the Service Connection to Dataverse that we set earlier
- serviceConnectionUrl : This is the main URL of the source Dataverse environment
- outdirectory : This is the path inside the code repository where the earlybound classes files will be created and commited
- settingsTemplateFilePath : This is the path to the json file that contains the modelbuilder parameters
2- Checkout
- checkout: self
  fetchDepth: 1
  persistCredentials: True
  displayName: 'Checkout'
This section of code checks out the code repository.
checkout: selfThis specifies that the pipeline should checkout the source code from the same repository that the pipeline is defined in.fetchDepth: 1This tells the pipeline to fetch only the latest changeset from the repository.persistCredentials: TrueThis ensures that the credentials used to trigger the pipeline are persisted and used for subsequent steps.
3- Install PowerPlatform Tools
# Installs PowerPlatform Tools (including PAC CLI)
- task: PowerPlatformToolInstaller@2
  displayName: 'Install Power Platform Build Tools'
This task uses Power Platform Tool Installer task from the PowerPlatform Build Tools. It installs the PAC CLI on the build agent so it can be invoked in subsequent tasks.
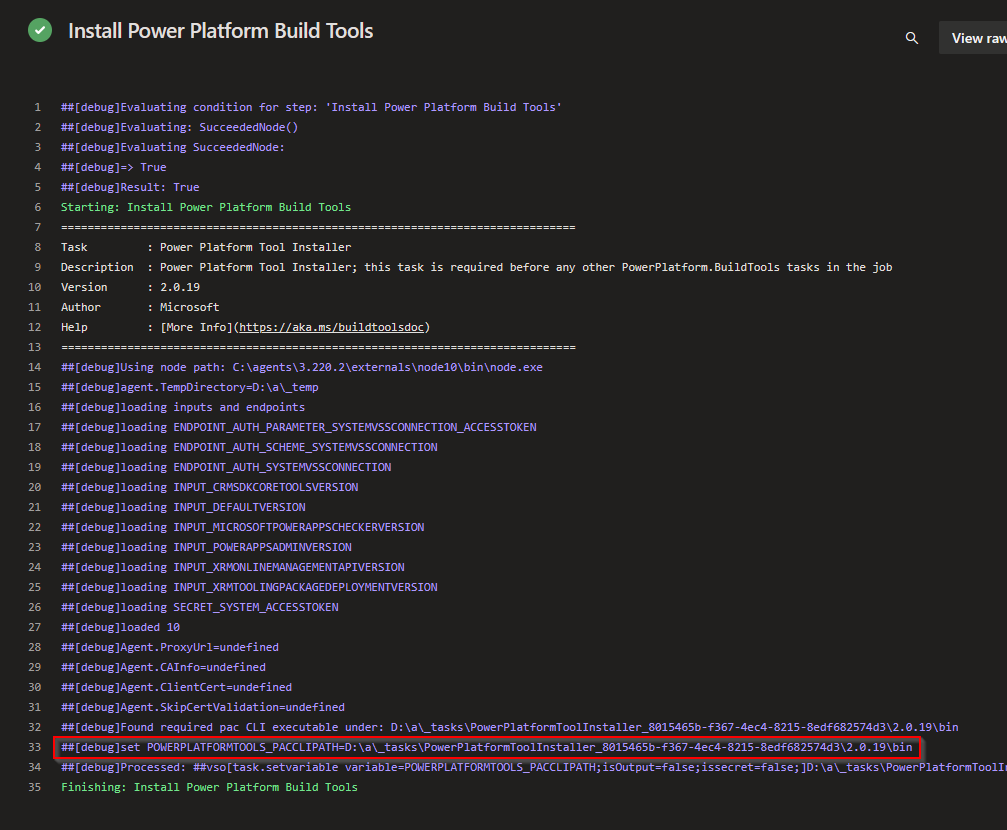
When the pipeline is run in debug mode (verbose) you’ll notice that the task sets a variable called POWERPLATFORMTOOLS_PACCLIPATH. This variable points to the folder in the build agent where the PowerPlatform Tools (including the PAC CLI) are downloaded. We’ll leverage this variable in subsequent steps to set the path to the PAC CLI executable.
More on all available PowerPlatform Build Tools tasks here
4- Set the path to the PAC CLI
# Set PACEXEPATH variable : the path to the PAC CLI executable
- pwsh: |
    $pacExePath = $env:POWERPLATFORMTOOLS_PACCLIPATH + "\pac\tools\pac.exe"
    echo "##vso[task.setvariable variable=PACEXEPATH]$pacExePath"
  displayName: 'Set Pac.Exe path'
This step consist of an inline PowerShell script that sets the variable PACEXEPATH that contains the path to the PAC CLI executable.
💡 Do you kow about the COE ALM Accelerator templates ?

This Github repository maintained by Microsoft is a real treasure trove that contains numerous pipeline scripts covering many different aspects of PowerPlatform ALM.

This is where I found out about the technique to get the PAC.EXE location.

https://github.com/microsoft/coe-alm-accelerator-templates/blob/f37fb218f29ca1c96ad84f2e215bb30cd0b58d84/PowerShell/build-deploy-solution-functions.ps1#L19

I highly recommend that you have a look at the repo (and why not give a star ⭐)
5- Set Connection variables
# Sets the Connection variables from the Service Connection passed in input parameter
# Will set BuildTools.ApplicationId, BuildTools.ClientSecret, BuildTools.TenantId
- task: PowerPlatformSetConnectionVariables@2
  displayName: 'Set Connection Variables - ${{parameters.serviceConnectionName}}'
  name: ConnectionVariables
  inputs:
    authenticationType: PowerPlatformSPN
    PowerPlatformSPN: '${{parameters.serviceConnectionName}}'
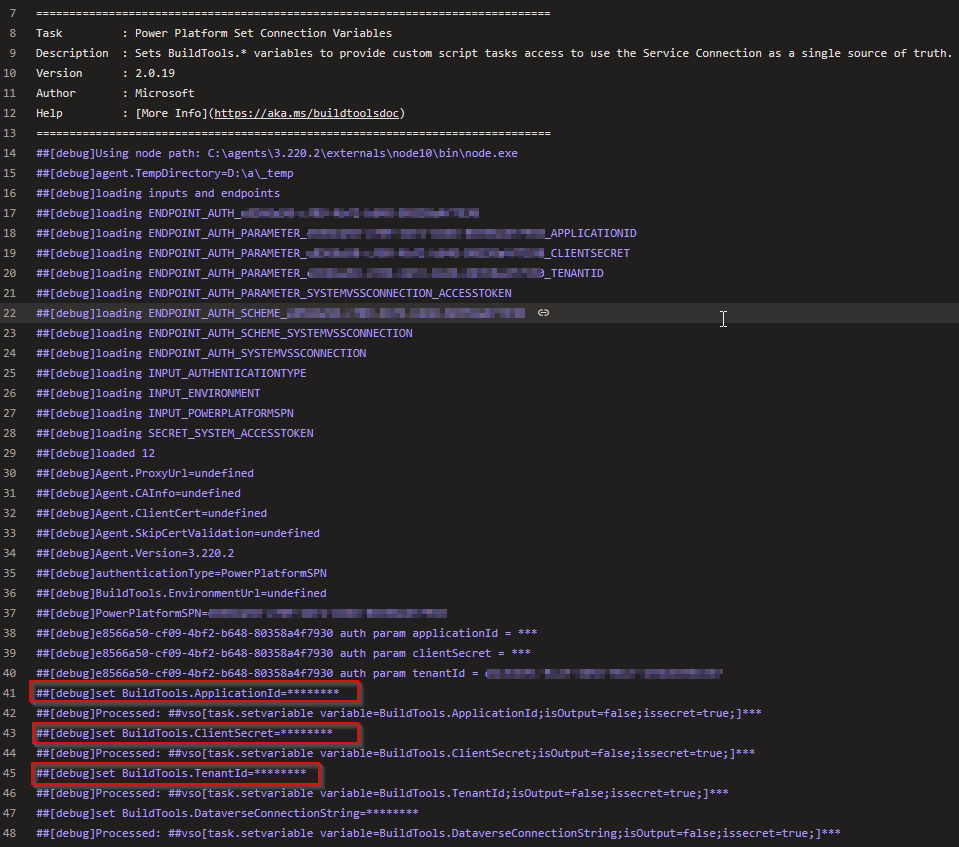
This is a very handy task from the Power Platform Build Tools. It takes the name of the service connection to Dataverse (created earlier) and extracts important connection values (AppId, ClientSecret, TenantId) in secret variables accessible to other tasks of the pipeline.
6- Connect to Source Dataverse environment
# PAC Auth - Connects to the Power Platform environment
- pwsh: |
    $pacCommand = "auth create --url ${{parameters.serviceConnectionUrl}} --applicationId $(ConnectionVariables.BuildTools.ApplicationId) --clientSecret $(ConnectionVariables.BuildTools.ClientSecret) --tenant $(ConnectionVariables.BuildTools.TenantId)"
    Write-Host "Pac command - $(PACEXEPATH) $pacCommand"

    Invoke-Expression -Command "$(PACEXEPATH) $pacCommand"

  displayName: 'PAC Auth'
In this inline Powershell script, we make a first call to the PAC CLI to establish a connection to the source Dataverse environment from which we want to create the early bound classes. A pac auth command is built using the connection variables and run using the Pac.exe.
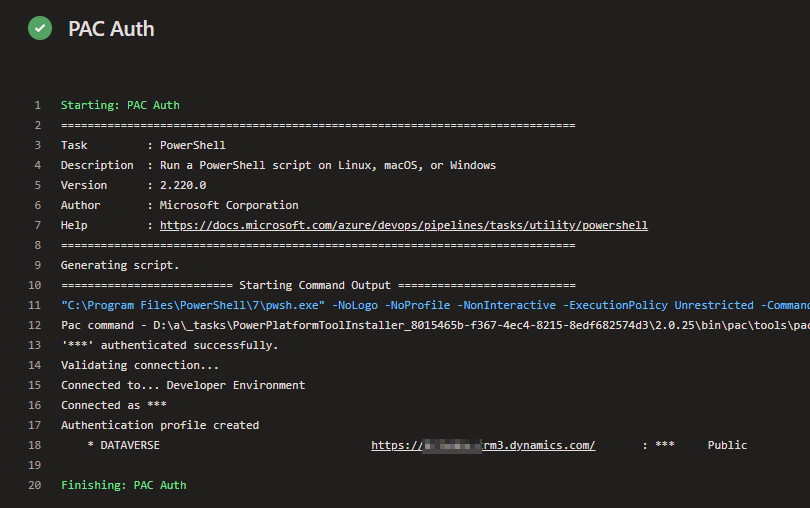
Link to pac auth command documentation
7- Execute PAC Modelbuilder
# PAC Model Builder - Delete content of outputfolder and Execute mopdelbuilder statement
- pwsh: |

    Get-ChildItem -Path ${{parameters.outdirectory}} -Include *.* -File -Recurse | foreach { $_.Delete()}
    write-host "Content of ${{parameters.outdirectory}} Deleted.." -BackgroundColor Green -ForegroundColor Black

    $pacCommand = "modelbuilder build --outdirectory ${{parameters.outdirectory}} --settingsTemplateFile ${{parameters.settingsTemplateFilePath}}"
    Write-Host "Pac command - $(PACEXEPATH) $pacCommand"

    Invoke-Expression -Command "$(PACEXEPATH) $pacCommand"
  displayName: 'PAC Modelbuilder'
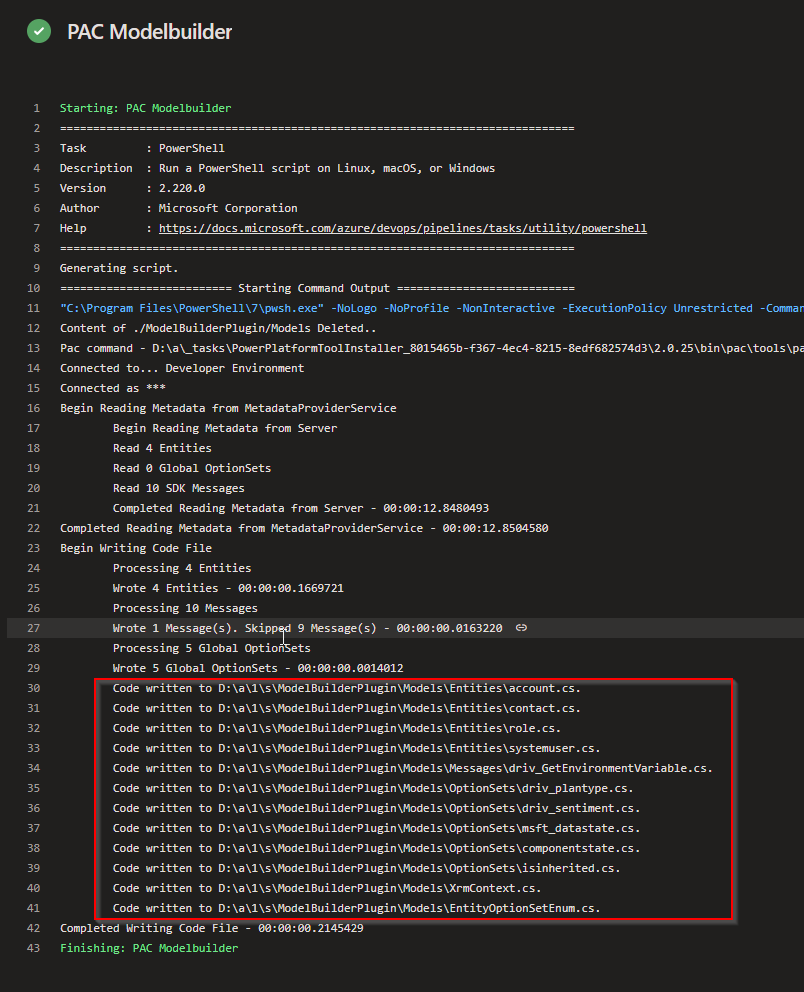
And for the main event of the pipeline, we start by clearing the content of the outdirectory. After that, a pac modelbuilder command is invoked using the builderSettings.json as template and the generated files are created in the outdirectory folder.
8- Commit to repository
# Commit changes
- script: |
    echo on
    git config --global user.email "$(Build.RequestedForEmail)"
    git config --global user.name "$(Build.RequestedFor)"
    git fetch
    set branch=$(Build.SourceBranch)
    set branch=%branch:refs/heads/=%
    echo source branch is %branch%
    git checkout %branch%
    git status
    git add --all
    git status
    git commit --no-edit --message "Early-bound classes generation v$(Build.BuildNumber)"
    git -c http.extraheader="AUTHORIZATION: bearer $(System.AccessToken)" push origin $(Build.SourceBranch)
  displayName: 'Commit Changes'
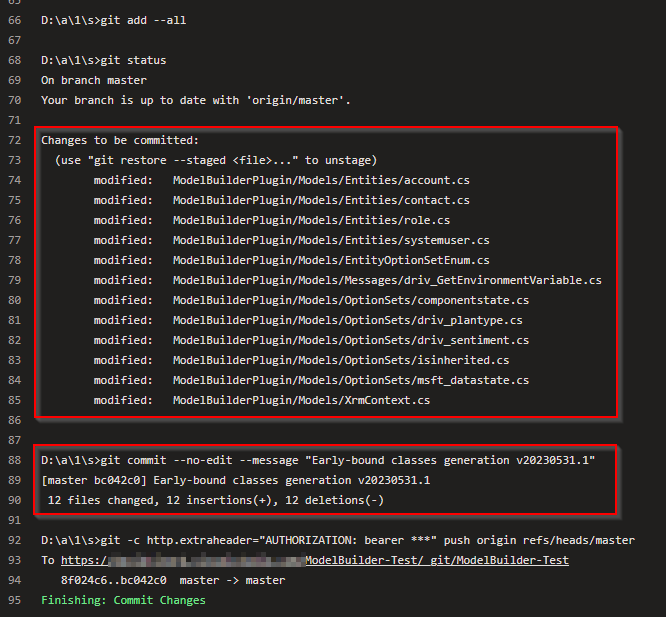
The final step contains a script used to commit the changes made by the pipeline job back to the source code repository.
And that is all there is! Simply pull the latest change from the repo on your local development machine and start building great solutions.
Rinse and repeat the process anytime you need to add new tables or when there are metadata changes on the source environment to keep the classes clean.
Takeaway
With this pipeline in place, we now have a steady and reliable work horse that generates the projects early-bound classes on demand using a cloud-based build agent. This ensures that anyone working on the project can easily initiate the models creation process in a consistent and repeatable manner.
I recently started to implement this approach in my professional and personal projects and I really like it so far.
Furthermore, while the pipeline shown leverages the PAC CLI modelbuilder command, the same method can be used to execute any other PAC CLI command from Azure DevOps pipelines.
Happy coding!
As usual, well-written David. Thank you for sharing your knowledge. I noticed that you mainly use Azure DevOps for automation. It would be wonderful if you could provide an example of Best Practice automation for Dataverse Plugins using Github actions.
Thanks Dan, glad you like the post. That’s a good idea, I’ll try to port this pipeline to GitHub Actions as well when I find some time. Thanks for the feedback.