
In my last post I explained how to enable custom webpack configurations in a PowerApps Control Framework project. I also showed how to generate the source-map file of the generated PCF bundle.
To continue on this track and push things a little further, I want to explore how to enhance the PCF development experience with the use of webpack plugins that can be referenced in the custom configuration file.
Altough there are tons of webpack plugins available (see links at the bottom) I will focus on 4 plugins that will help :
- ⌚ Measure up the build time
- 👁️ Get insight on the bundle composition and size
- 🏃♂️ Build your project faster
- 🧹 Cleanup the stage between each build.
What are Webpack Plugins
Before we dive deeper on the matter, remember that webpack is the bundler that is used by the PCF framework to create the deployable artifacts (bundle.js) out of the source code and other dependencies like referenced npm packages.

By definition, a webpack plugin is a piece of code that as access and can interact with the whole webpack compilation events and objects.
As stated in the official Webpack documention, Plugins are the backbone of webpack and most of webpack itself is architectured around plugins.
Webpack Plugin in a PCF project
To make use of webpack plugins in a PCF project, just import and reference them in a custom configuration file webpack.config.js (see my previous post for more context)
At this point, I assume that you have enabled the pcfAllowCustomWebpack feature flag by adding a featureconfig.json file at the root of your projet
To add plugins to your configuration, just add a ‘plugin‘ node inside the module.exports of the webpack.config.js at the root of the project. This is where the plugins code will be added in the next sections
At build time, this file gets merged with the out of the box webpack configuration of the PCF framework (located at node_modules\pcf-scripts\webpackConfig.js)
⌚ Speed Measure Webpack Plugin
https://github.com/stephencookdev/speed-measure-webpack-plugin
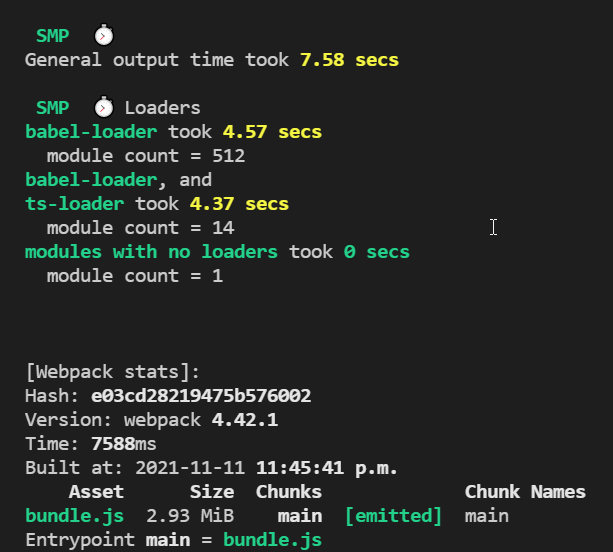
The first plugin I want to show is Speed Measure Webpack Plugin. By enabling this plugin, you’ll be able to get valuable insight on the time it takes for every step of the build process to complete. This will help later on to demonstrate the usage of other plugins.
Install the npm package and add the following code to the webpack.config.js file
npm install --save-dev speed-measure-webpack-pluginNotice that this plugin is a bit different from the others as you don’t put the code inside the plugin node but instead you are wrapping all the content of the module.exports with the plugin instance (smp.wrap())
Now when you build the project, there will be a new section in the output log where you can see the statistics of each loaders and plugin involved in the bundling of your component. Pretty slick 🤓 eh.
👁️Webpack Vizualizer
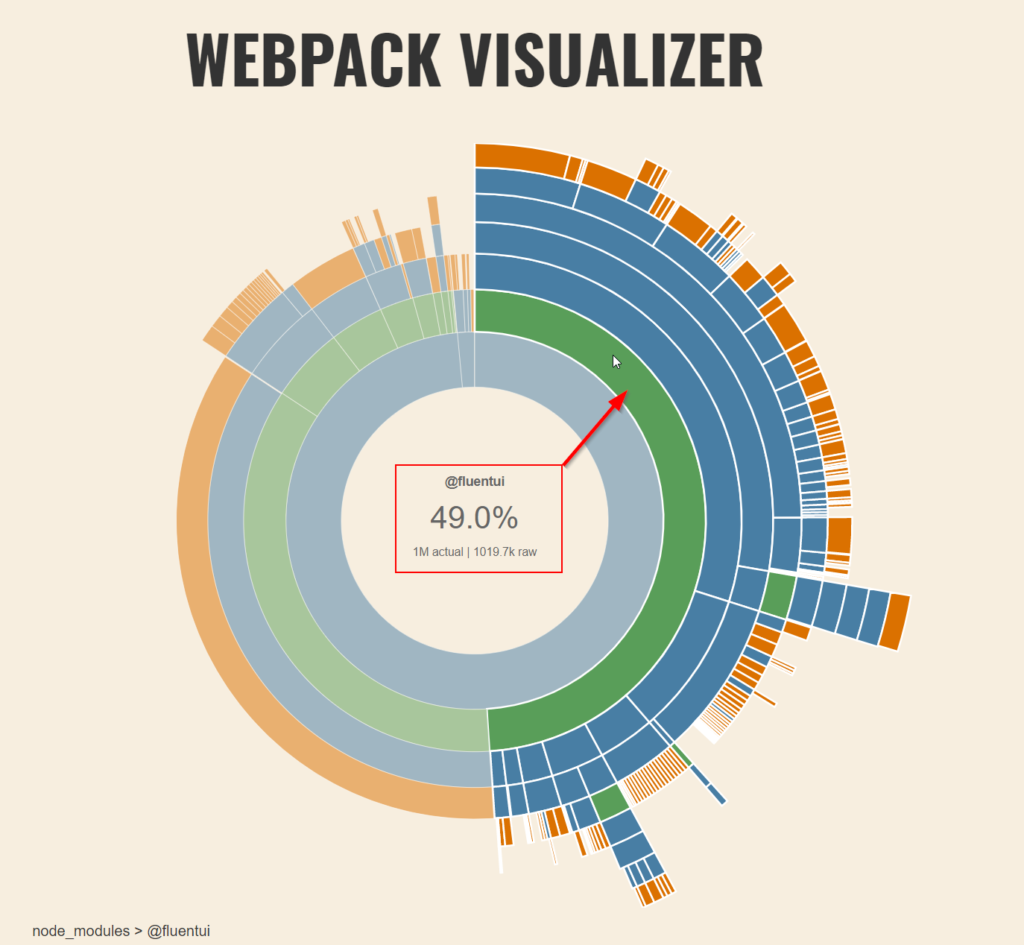
The Webpack Visualizer plugin can help get a clear picture of the bundle composition.
This plugin will generate a webpage out of the statistics gathered by the webpack compilation process. You’ll be able to see all the packages referenced in the project and their respective size. This can be very useful to assess if a specific library is bloating the bundle or to spot duplicated libraries.
Just install the npm package and add the following code to the webpack.config.js file
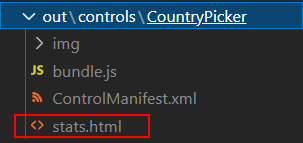
npm install --save-dev webpack-visualizer-pluginWhen the project is built, notice a new file called stats.html in the build folder.
Open the file and a nice interactive chart that expresses the packages sizes contained in the bundle will be shown. For example, here FluentUI accounts for 49% of my control composition.
As a side note, you might want to comment out this plugin code before building your deployable solution as it will put the stats.html file in your solution .zip file (more on that later). You can also change the output folder in the options of the plugin, just look at the documentation.
There are other very intersting plugins for bundle statistics and visualization like webpack-bundle-analyzer I encourage you to have look and find the one that best suits your needs.
🏃♂️ Hard Source Webpack Plugin
This one is very interesting as it will cache some info about the build process and significally speedup the build time.
Again, install the npm package and insert the plugin code in your webpack.config.js file
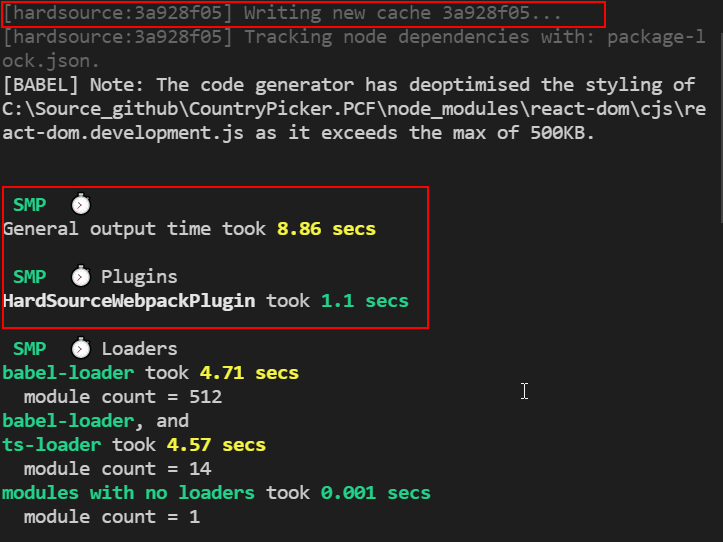
npm install --save-dev hard-source-webpack-pluginHere’s where it gets interesting. Once this plugin is enabled, the first time you build the project you will see no difference in build time, but some of the heavy lifting stuff will be cached on disk.
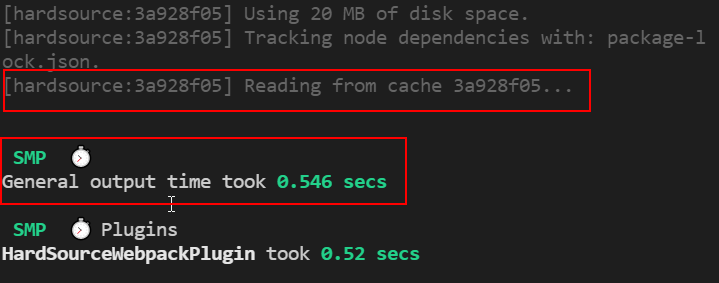
If you look at the output below, you see that a cache is being created. (We can see the SMP plugin shown earlier in action that measures the processing time of the hard source plugin)
Now if you rebuild the project without doing any changes you’ll see that the build time dropped drastically because the data on cache was used.
I know this doesn’t prove nothing since there where no changes to the source code, so here I made changes to 3 typescript files in the project and rebuilt. here’s the results
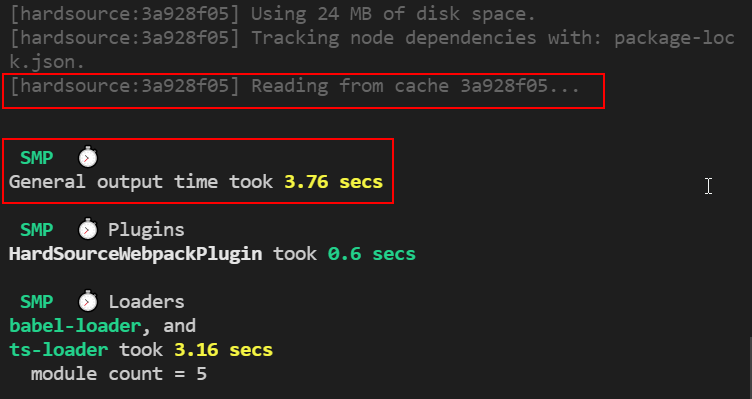
You can appreciate that the build time is now more than half of the initial build time (3.76 sec vs 8.86). I agree that this can be insignificant for small projects, but it can be really useful for big PCF projects.
🧹Clean Webpack Plugin
Last but not the least, Clean Weppack Plugin will help to clean up the output folder at every succesful build.
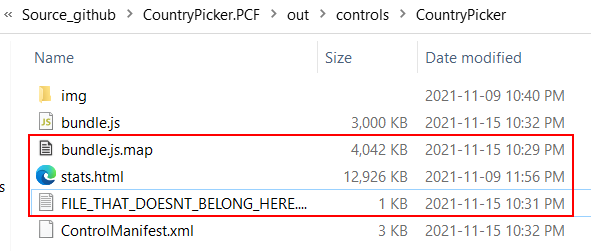
By default, the out folder doesn’t get sweeped between each build, so if like me you experiment a lot with plugins and source-map files, you can end up with unwanted files in the output directory.
Now even if for instance, you comment out the lines in your webpack configuration that generates extra files (ex. source-map, stats.html), you can see below that the build started at 10:32 PM only overwrited the files generated by the current build and left the 3 unwanted files in the directory.
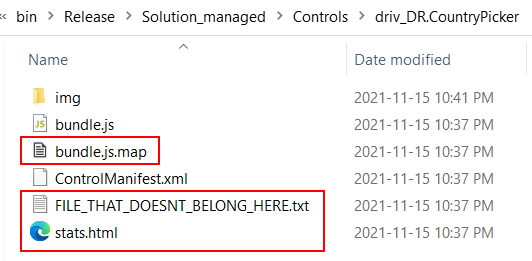
Even worse 😒, these unwanted files will be included in the generated solution packages and deployed into your Dataverse Environments, as you can see in the extracted zip file below
To rectify this situation, just install the npm package and insert the plugin code in your webpack.config.js file
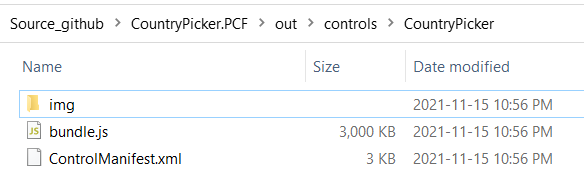
npm install --save-dev clean-webpack-pluginFrom now on the build folder will be wiped-out at evey build. As you can see below, the next build of the same project using CleanWebpackPlugin will yield only the desired files in the output directory.
Conclusion
If we mix all these together, my custom webpack configuration would look something like this. It’s very easy to comment lines as needed when functionalities are not needed (ex. source-map and Visualizer)
Hopefully this will give you some ideas on how to improve your PCF development experience. Above all, I really feel like I have just scratch the surface here.
Here’s some interesting ressources to find more plugins and use cases.
hard-source-webpack-plugin is really appealing, but it causes my build to fail. Seems like it might have issues with webpack 5. Ther error when building through pcf-scripts build just shows
[webpack stats] undefined
But when I run webpack directly from the command line, it gives a better error:
Cannot find module ‘webpack/lib/DependenciesBlockVariable’
DependenciesBlockVariable seems to have been removed in webpack 5.
I wonder if when you wrote this post, pac pcf might have been using webpack 4?
Thank you for mentioning that it was removed from webpack 5. By switching to webpack 4.9.0, I was able to get around this error.