
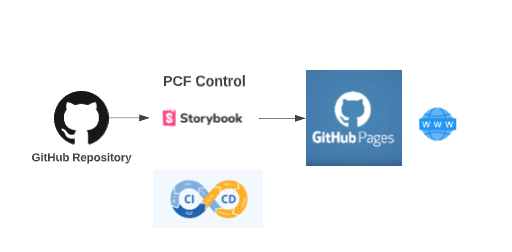
This is the second part of a series on Storybook for PowerApps Component Framework (PCF) controls, where I take one of my community PCF control hosted on Github (CountryPicker.PCF) and implement a Storybook from scratch.
While the first post, revolved around the setup and authoring process of the Storybook, this one focuses on the publishing steps required to make Storybook static site publicly available from GitHub Pages.
We’ll start by uploading the Storybook site manually. And then, with the help of a GitHub action, we will implement a release pipeline that publishes the site on every commit to the code repository.
Why GitHub Pages ?
In essence, Storybook is an open source framework used to develop, test and document UI components in isolation. It creates beautiful static websites out of the stories (use cases) that can be shared amongst team members or publicly.
GitHub Pages is a 💸 free static site web hosting service that can serve sites directly from a GitHub repository. Moreover, since the PCF project used is already hosted on GitHub, It makes a lot of sense to host the Storybook site using the GitHub Pages service.
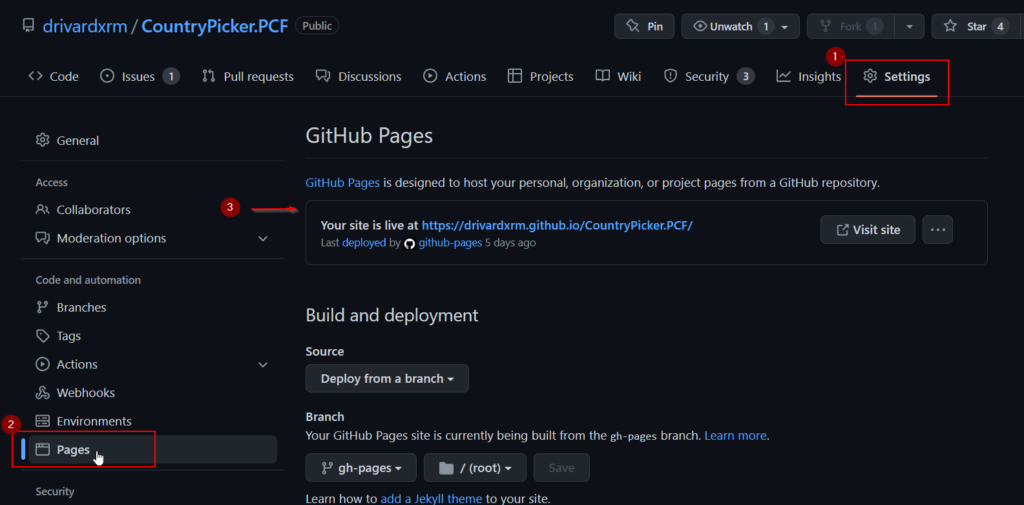
When published GitHub Pages sites can be reached following this convention :
https://{your_github_handle}.github.io/{repository_name}You can access the GitHub Pages configurations by navigating to the Settings -> Pages Tab of any GitHub repository.
The subject is vast and goes far beyond the scope of this post. If you want to dig deeper into GitHub pages, here are some good reads :
👉About GitHub Pages - GitHub Docs
👉Collection: GitHub Pages examples
Publish Storybook to GitHub Pages manually
To better understand the process, let’s build and deploy our site to GitHub Pages manually at first. We will continue where we left in part 1.
I'm following the steps described in this blog post :
👉How to Deploy Storybook to GitHub Pages | by Armin Yazdani | The Startup | Medium
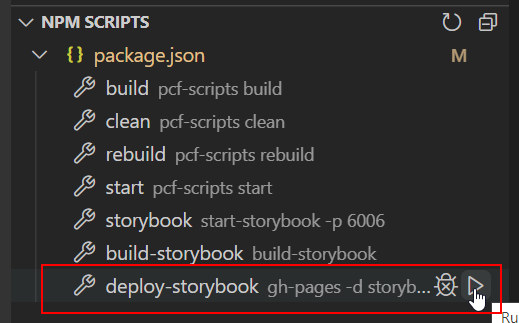
Let’s start by installing the gh-pages npm package to the project.
npm install gh-pages --save-dev
Then add the following line in the scripts section of the package.json file.
"deploy-storybook": "gh-pages -d storybook-static"

This script will execute the gh-pages deploy command with the content of Storybook default output folder (storybook-static).
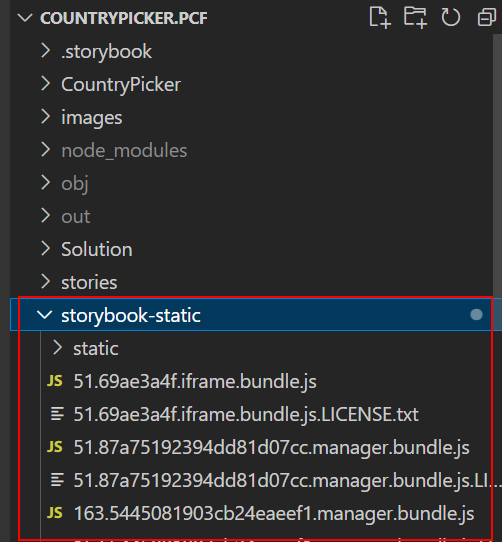
To ensure that we have the latest version at hand, the first step is to compile the Storybook by running the build-storybook command. Since we are using the default configurations, this will produce the output of the static website in the ‘storybook-static‘ folder.
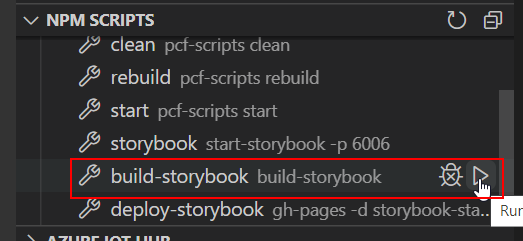
Now we can run the deploy-storybook script that was added earlier.
The first time that the deploy-storybook script is executed, it automatically creates a ‘gh-pages‘ branch in the code repository (…this will be useful later). After that it copies and commit the content of the local storybook-static folder into it.

Upon any commit to the gh-pages branch, an internal GitHub action ‘pages-build-deployment‘ will kick, that will deploy the content of the branch to GitHub Pages.
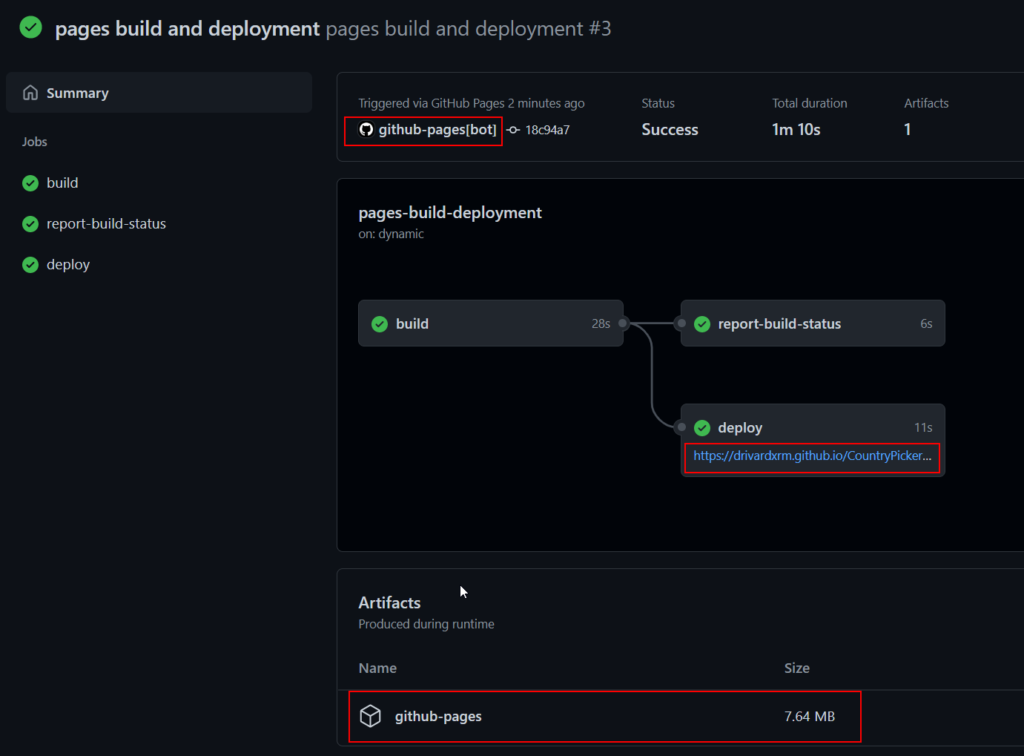
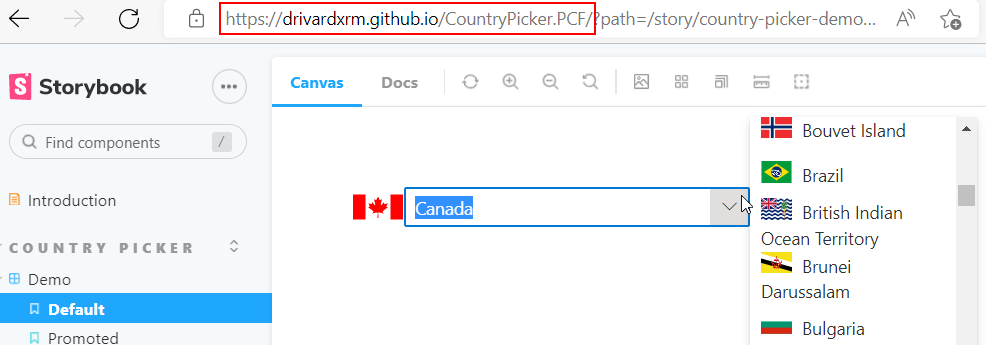
Once the pages-build-deployment action is completed, you’ll be able to appreciate your Storybook static website at the repository’s own GitHub Pages address : https://{your_github_handle}.github.io/{repository_name}
That’s a good start, but it’s far from ideal since most of the steps were done manually and the content of the site came from a local folder.
Publish Storybook to GitHub Pages Automatically
Let’s push this a little further and automate the process so that a fresh version of the Storybook website gets published on every commit to the underlying GitHub repository.
I'm basically following the steps from this blog post, so credit goes to the author
👉https://budiirawan.com/how-to-publish-storybook-github-pages/
Because of the manual publish done earlier our code repository already contains a gh-pages branch so the only remaining step is to create a GitHub action folder in the project .github/workflows/ and create an action file storybook.yml.
The script uses the following (widely used) community GitHub action
👉 https://github.com/JamesIves/github-pages-deploy-action
Once commited in the repo, the action will trigger on every commit to the main branch. It’s basically doing the same thing explained earlier in the manual steps but inside a build agent instead of locally on your computer.
- run build-storybook -> will generate the Storybook static website in the storybook-static folder.
- github-pages-deploy-action -> will publish the content of the storybook-static folder in the gh-pages branch.
- Upon commit to the gh-pages branch, the pages-build-deployment action will be triggered and the site will be published.
Thats all there is, you now have a fully automated release pipeline for your PCF control Storybook site. You won’t have to do anything and your Storybook website will be refreshed upon any change the source code.
This makes GitHub Pages the perfect vehicule to host Storybook sites and broadcast community PCF controls usage and documentation to potential users.
The final Storybook can be found here :
👉https://drivardxrm.github.io/CountryPicker.PCF/
Links


Image by Mahesh Patel from Pixabay
Be First to Comment